
Tutorial for beginners: A few steps with screenshots in this post will help you learn how to insert and position an image in the sidebar at your blog on WordPress. You can check out our earlier tutorial for bloggers who have their blogs hosted at Blogspot
1. Please go into your LOGIN page by typing ‘http://yourblogaddress/wp-admin’. Please input your UserName and Password.

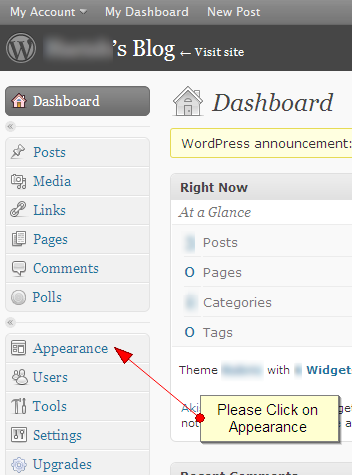
2. Once you are logged in, You will be redirected to your DASHBOARD page. In the dashboard page, you will find an option called APPEARANCE. Please click on that.
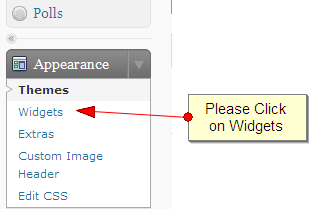
3. When you click on appearance, the tab will DROPDOWN. Please click on Widgets in the tab.
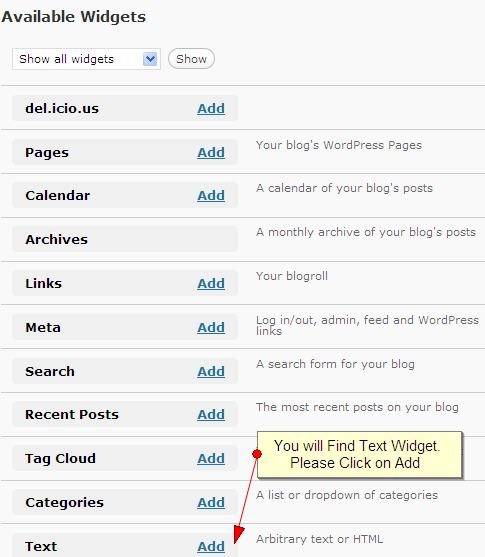
4. You will be Redirected to the widgets menu page. In the Widgets page, You will find the ‘Text’ widget at the bottom of the list. Please click on that to add the widget.
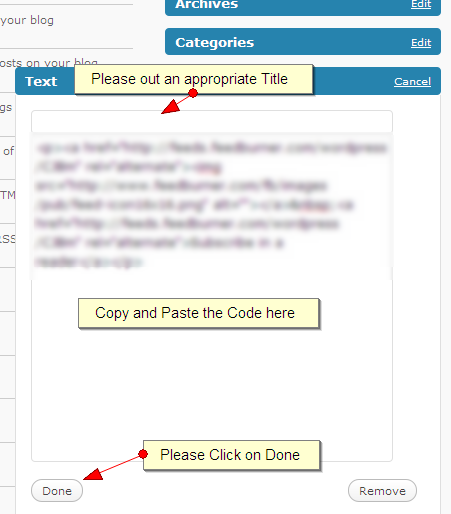
5. When you click on Add, you will notice that the ‘Text’ Widget has been added to the sidebar. Now we have to edit the ‘Text’ Widget. So we press the ‘Edit’ button to edit the widget.

6. When you Click on EDIT, you will get an POPUP with the EDITING OPTION. In the edit option, Please put an appropriate title and COPY-PASTE the code there. When you are Done with it, Please click on DONE!
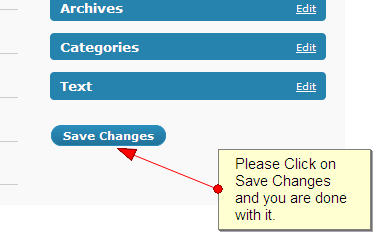
7. To finish the Process, the popup will close automatically and you will get an option to SAVE CHANGES. After saving the changes you can see the image in your blog’s sidebar
In our earlier post, we explained how to insert images in your sidebar at Blogspot. Do let us know if you require help on any topics and we can make a tutorial on it. And yes, if you are aware of any shortcuts or tips, do share with the community here.
Really helpful. I managed to do it.
Thanks, I have done that on both of my blogs.
I cannot find the code to Blogadda.
Please help
Thank you for the help.
Really very helpful…
Thanks I have done it.